  1
  2
  3
  4
  5
  6
  7
  8
  9
 10
 11
 12
 13
 14
 15
 16
 17
 18
 19
 20
 21
 22
 23
 24
 25
 26
 27
 28
 29
 30
 31
 32
 33
 34
 35
 36
 37
 38
 39
 40
 41
 42
 43
 44
 45
 46
 47
 48
 49
 50
 51
 52
 53
 54
 55
 56
 57
 58
 59
 60
 61
 62
 63
 64
 65
 66
 67
 68
 69
 70
 71
 72
 73
 74
 75
 76
 77
 78
 79
 80
 81
 82
 83
 84
 85
 86
 87
 88
 89
 90
 91
 92
 93
 94
 95
 96
 97
 98
 99
100
101
102
103
104
105
106
107
108
109
110
111
112
113
114
115
116
117
118
119
120
121
122
123
124
125
126
127
128
129
130
131
132
133
134
135
136
137
138
139
140
141
142
143
144
145
146
147
148
149
150
151
152
153
154
155
156
157
158
159
160
161
162
163
164
165
166
167
168
169
170
171
172
173
174
175
176
177
178
179
180
181
182
183
184
185
186
187
188
189
190
191
192
193
194
195
196
197
198
199
200
201
202
203
204
205
206
207
208
209
210
211
212
213
214
215
216
217
218
219
220
221
222
223
224
225
226
227
228
229
230
231
232
233
234
235
236
237
238
239
240
241
242
243
244
245
246
247
248
249
250
251
252
253
254
255
256
257
258
259
260
261
262
263
|
/* 作者:flyAkari 会飞的阿卡林 bilibili UID:751219
* 本代码适用于ESP8266 NodeMCU + 12864显示屏
* 7pin SPI引脚,正面看,从左到右依次为GND、VCC、D0、D1、RES、DC、CS
* ESP8266 --- OLED
* 3V --- VCC
* G --- GND
* D7 --- D1
* D5 --- D0
* D2orD8--- CS
* D1 --- DC
* RST --- RES
* 4pin IIC引脚,正面看,从左到右依次为GND、VCC、SCL、SDA
* ESP8266 --- OLED
* 3.3V --- VCC
* G (GND) --- GND
* D1(GPIO5)--- SCL
* D2(GPIO4)--- SDA
*/
#include <TimeLib.h>
#include <ESP8266WiFi.h>
#include <WiFiUdp.h>
#include <SPI.h>
#include <DYWiFiConfig.h>
#include <U8g2lib.h>
//若屏幕使用SH1106,只需把SSD1306改为SH1106即可
//U8G2_SSD1306_128X64_NONAME_F_4W_HW_SPI u8g2(U8G2_R0, /* cs=*/4, /* dc=*/5, /* reset=*/3);
U8G2_SSD1306_128X64_NONAME_F_HW_I2C u8g2(U8G2_R0, /* reset=*/ U8X8_PIN_NONE);
//U8G2_SSD1306_128X64_NONAME_F_HW_I2C u8g2(U8G2_R0, /* reset=*/ U8X8_PIN_NONE, /* clock=*/ 4, /* data=*/ 5); //D-duino
DYWiFiConfig wificonfig;
ESP8266WebServer webserver(80);
//#define DEF_WIFI_SSID "D1"
//#define DEF_WIWI_PASSWORD "01234567890"
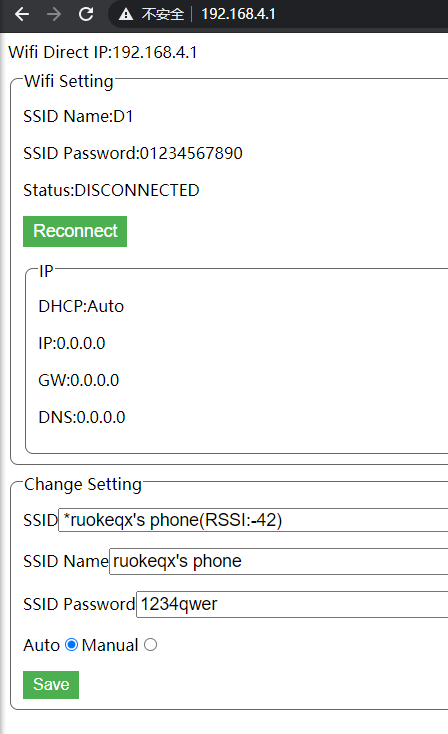
#define DEF_WIFI_SSID "ruokeqx's phone"
#define DEF_WIWI_PASSWORD "1234qwer"
#define AP_NAME "ruokeqx" //dev
void wificb(int c)
{
Serial.print("=-=-=-=-");
Serial.println(c);
}
static const char ntpServerName[] = "ntp1.aliyun.com"; //NTP服务器,阿里云
const int timeZone = 8; //时区,北京时间为+8
WiFiUDP Udp;
unsigned int localPort = 8888; // 用于侦听UDP数据包的本地端口
time_t getNtpTime();
void sendNTPpacket(IPAddress& address);
void oledClockDisplay();
void sendCommand(int command, int value);
void initdisplay();
boolean isNTPConnected = false;
const unsigned char xing[] U8X8_PROGMEM = {
0x00, 0x00, 0xF8, 0x0F, 0x08, 0x08, 0xF8, 0x0F, 0x08, 0x08, 0xF8, 0x0F, 0x80, 0x00, 0x88, 0x00,
0xF8, 0x1F, 0x84, 0x00, 0x82, 0x00, 0xF8, 0x0F, 0x80, 0x00, 0x80, 0x00, 0xFE, 0x3F, 0x00, 0x00
}; /*星*/
const unsigned char liu[] U8X8_PROGMEM = {
0x40, 0x00, 0x80, 0x00, 0x00, 0x01, 0x00, 0x01, 0x00, 0x00, 0xFF, 0x7F, 0x00, 0x00, 0x00, 0x00,
0x20, 0x02, 0x20, 0x04, 0x10, 0x08, 0x10, 0x10, 0x08, 0x10, 0x04, 0x20, 0x02, 0x20, 0x00, 0x00
}; /*六*/
void setup()
{
Serial.begin(115200);
while (!Serial)
continue;
Serial.println("NTP Clock oled version v1.1");
Serial.println("Designed by flyAkari");
initdisplay();
u8g2.clearBuffer();
u8g2.setFont(u8g2_font_unifont_t_chinese2);
u8g2.setCursor(0, 14);
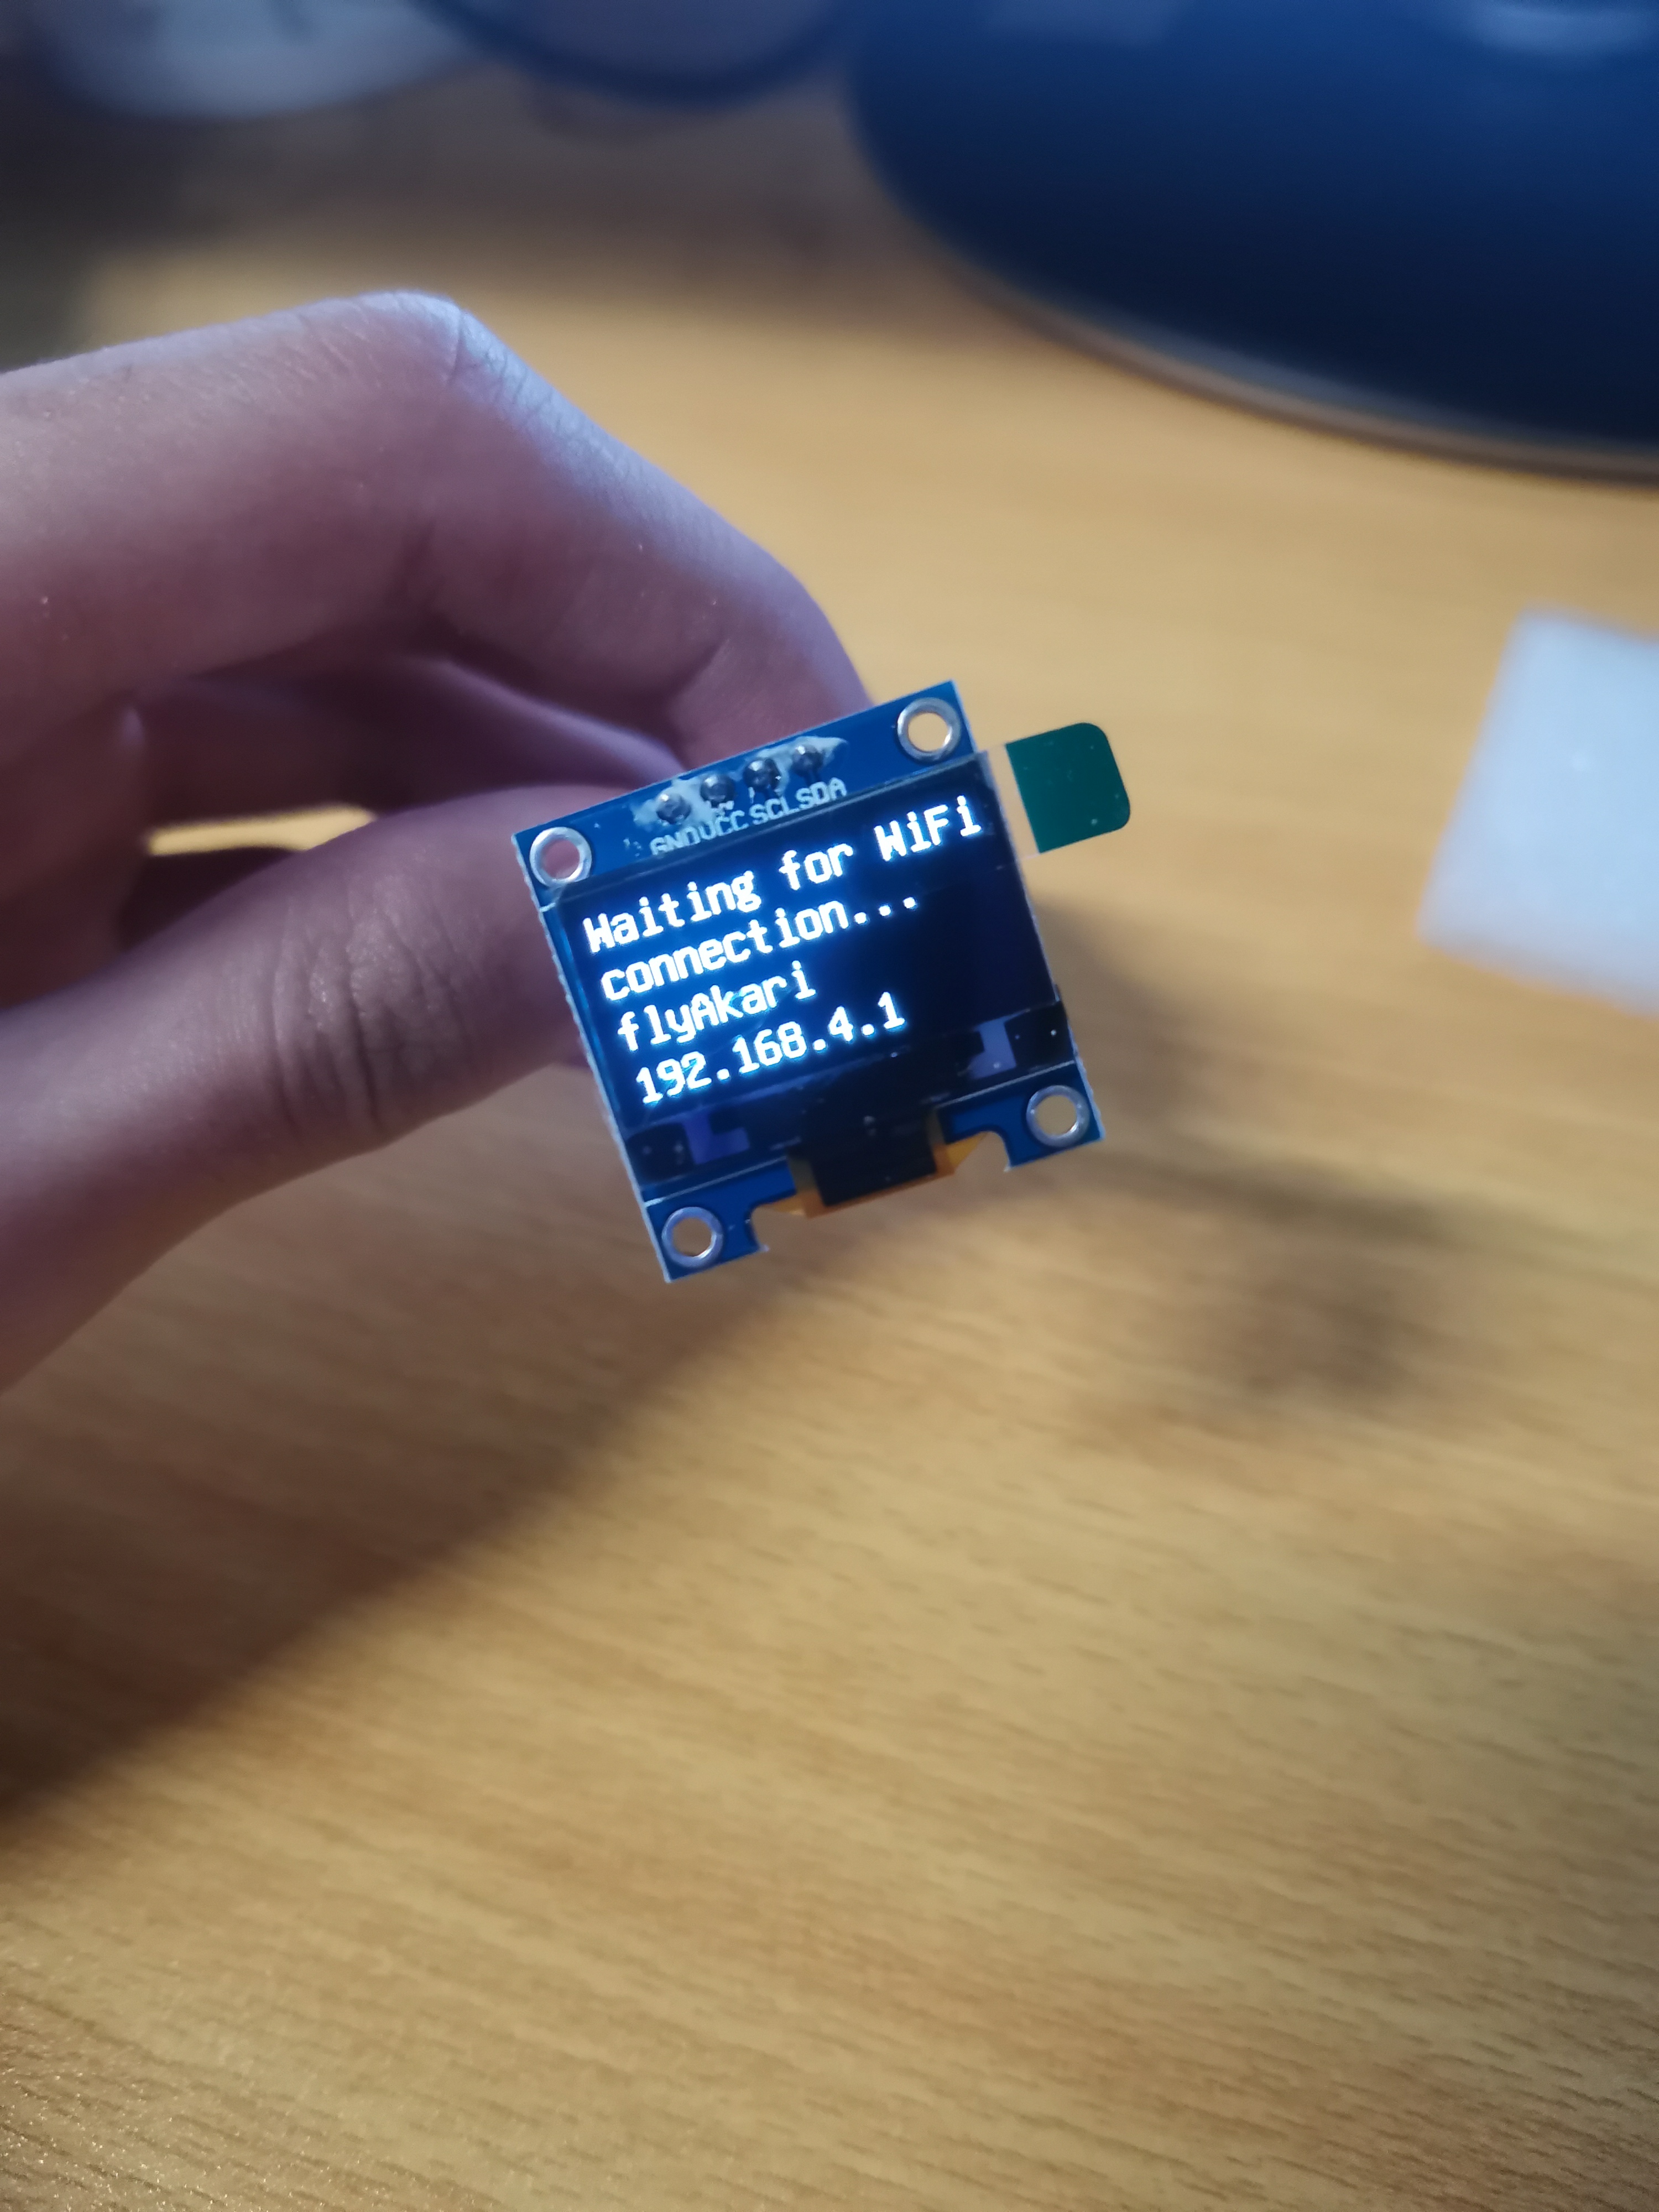
u8g2.print("Waiting for WiFi");
u8g2.setCursor(0, 30);
u8g2.print("connection...");
u8g2.setCursor(0, 47);
u8g2.print("flyAkari");
u8g2.setCursor(0, 64);
u8g2.print("192.168.4.1");
u8g2.sendBuffer();
Serial.println("OLED Ready");
Serial.print("Connecting WiFi...");
wificonfig.begin(&webserver, "/");
DYWIFICONFIG_STRUCT defaultConfig = wificonfig.createConfig();
strcpy(defaultConfig.SSID, DEF_WIFI_SSID);
strcpy(defaultConfig.SSID_PASSWORD, DEF_WIWI_PASSWORD);
strcpy(defaultConfig.HOSTNAME, AP_NAME);
strcpy(defaultConfig.APNAME, AP_NAME);
wificonfig.setDefaultConfig(defaultConfig);
wificonfig.enableAP();
while (WiFi.status() != WL_CONNECTED)
{
wificonfig.handle(); //若不需要Web后台,可以注释掉此行
//Serial.println("Waiting for Connection...");
}
Serial.println("");
Serial.println("WiFi connected");
Serial.println("IP address: ");
Serial.println(WiFi.localIP());
Serial.println("Starting UDP");
Udp.begin(localPort);
Serial.print("Local port: ");
Serial.println(Udp.localPort());
Serial.println("waiting for sync");
setSyncProvider(getNtpTime);
setSyncInterval(30); //每300秒同步一次时间
isNTPConnected = true;
}
time_t prevDisplay = 0; //当时钟已经显示
void loop()
{
if (timeStatus() != timeNotSet)
{
if (now() != prevDisplay)
{ //时间改变时更新显示
prevDisplay = now();
oledClockDisplay();
}
}
wificonfig.handle(); //若不需要Web后台,可以注释掉此行
}
void initdisplay()
{
u8g2.begin();
u8g2.enableUTF8Print();
}
void oledClockDisplay()
{
int years, months, days, hours, minutes, seconds, weekdays;
years = year();
months = month();
days = day();
hours = hour();
minutes = minute();
seconds = second();
weekdays = weekday();
Serial.printf("%d/%d/%d %d:%d:%d Weekday:%d\n", years, months, days, hours, minutes, seconds, weekdays);
u8g2.clearBuffer();
u8g2.setFont(u8g2_font_unifont_t_chinese2);
u8g2.setCursor(0, 14);
if (isNTPConnected)
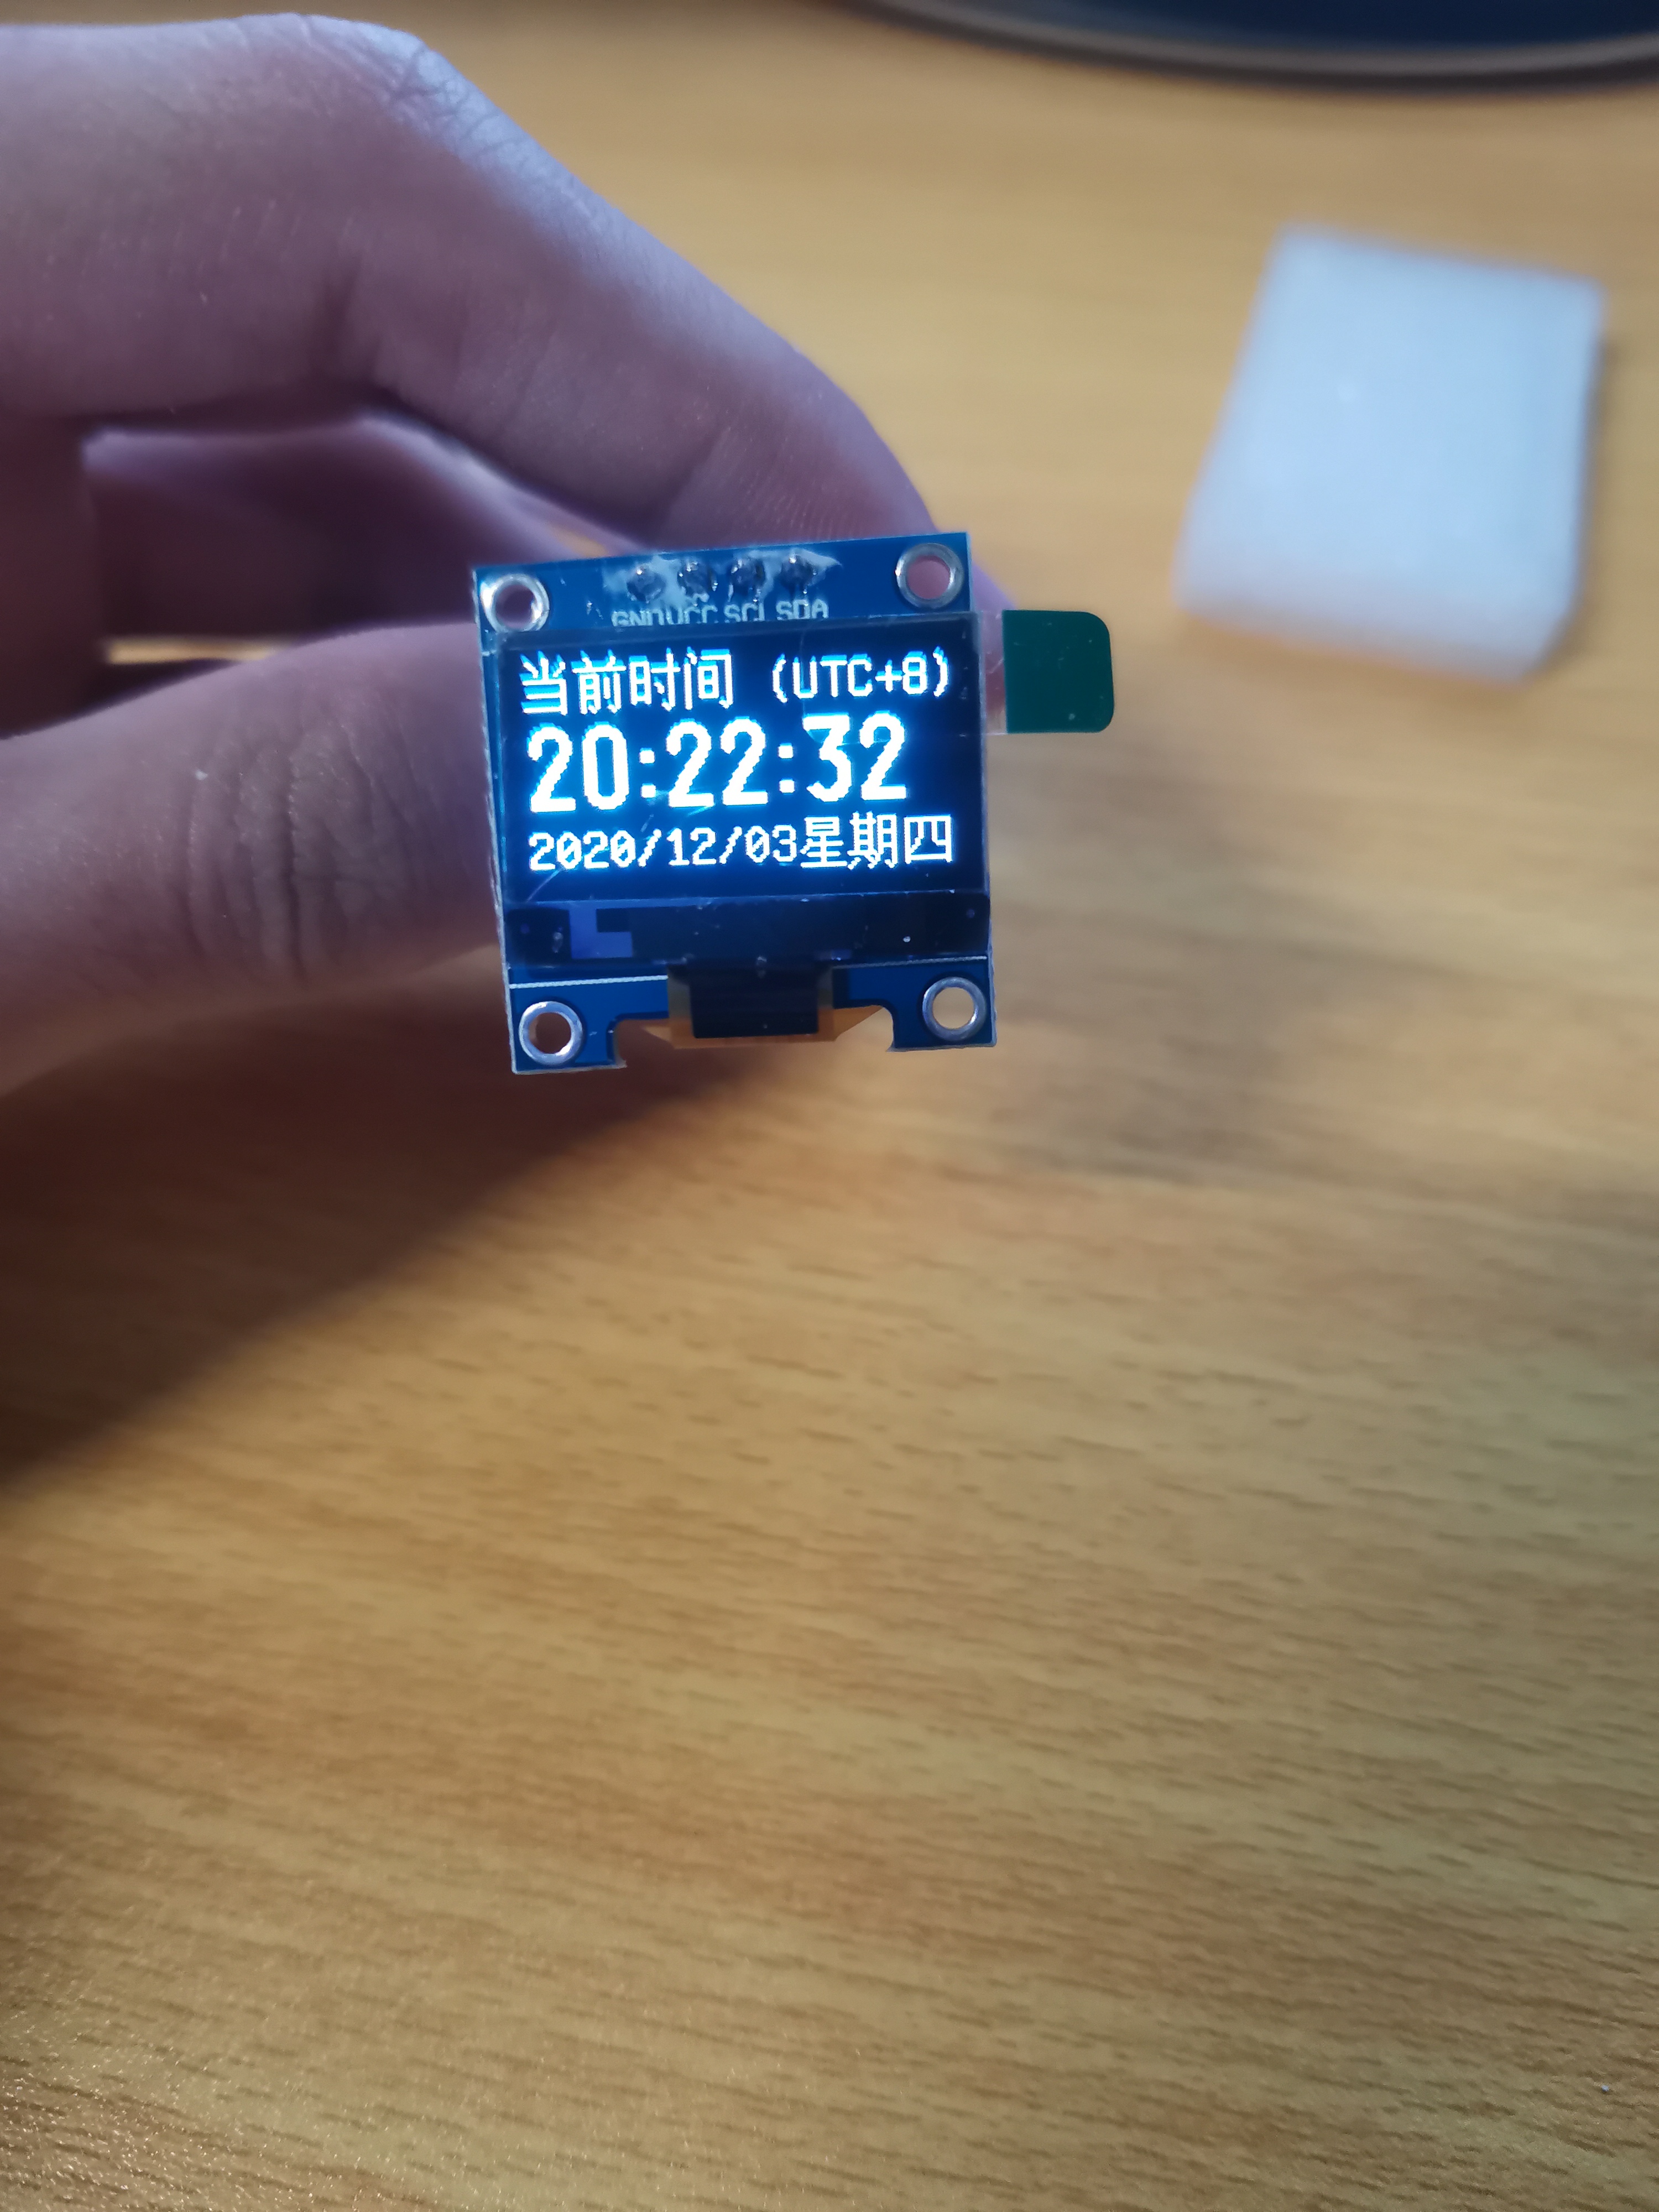
u8g2.print("当前时间 (UTC+8)");
else
u8g2.print("无网络!"); //如果上次对时失败,则会显示无网络
String currentTime = "";
if (hours < 10)
currentTime += 0;
currentTime += hours;
currentTime += ":";
if (minutes < 10)
currentTime += 0;
currentTime += minutes;
currentTime += ":";
if (seconds < 10)
currentTime += 0;
currentTime += seconds;
String currentDay = "";
currentDay += years;
currentDay += "/";
if (months < 10)
currentDay += 0;
currentDay += months;
currentDay += "/";
if (days < 10)
currentDay += 0;
currentDay += days;
u8g2.setFont(u8g2_font_logisoso24_tr);
u8g2.setCursor(0, 44);
u8g2.print(currentTime);
u8g2.setCursor(0, 61);
u8g2.setFont(u8g2_font_unifont_t_chinese2);
u8g2.print(currentDay);
u8g2.drawXBM(80, 48, 16, 16, xing);
u8g2.setCursor(95, 62);
u8g2.print("期");
if (weekdays == 1)
u8g2.print("日");
else if (weekdays == 2)
u8g2.print("一");
else if (weekdays == 3)
u8g2.print("二");
else if (weekdays == 4)
u8g2.print("三");
else if (weekdays == 5)
u8g2.print("四");
else if (weekdays == 6)
u8g2.print("五");
else if (weekdays == 7)
u8g2.drawXBM(111, 49, 16, 16, liu);
u8g2.sendBuffer();
}
/*-------- NTP 代码 ----------*/
const int NTP_PACKET_SIZE = 48; // NTP时间在消息的前48个字节里
byte packetBuffer[NTP_PACKET_SIZE]; // 输入输出包的缓冲区
time_t getNtpTime()
{
IPAddress ntpServerIP; // NTP服务器的地址
while (Udp.parsePacket() > 0); // 丢弃以前接收的任何数据包
Serial.println("Transmit NTP Request");
// 从池中获取随机服务器
WiFi.hostByName(ntpServerName, ntpServerIP);
Serial.print(ntpServerName);
Serial.print(": ");
Serial.println(ntpServerIP);
sendNTPpacket(ntpServerIP);
uint32_t beginWait = millis();
while (millis() - beginWait < 1500)
{
int size = Udp.parsePacket();
if (size >= NTP_PACKET_SIZE)
{
Serial.println("Receive NTP Response");
isNTPConnected = true;
Udp.read(packetBuffer, NTP_PACKET_SIZE); // 将数据包读取到缓冲区
unsigned long secsSince1900;
// 将从位置40开始的四个字节转换为长整型,只取前32位整数部分
secsSince1900 = (unsigned long)packetBuffer[40] << 24;
secsSince1900 |= (unsigned long)packetBuffer[41] << 16;
secsSince1900 |= (unsigned long)packetBuffer[42] << 8;
secsSince1900 |= (unsigned long)packetBuffer[43];
Serial.println(secsSince1900);
Serial.println(secsSince1900 - 2208988800UL + timeZone * SECS_PER_HOUR);
return secsSince1900 - 2208988800UL + timeZone * SECS_PER_HOUR;
}
}
Serial.println("No NTP Response :-("); //无NTP响应
isNTPConnected = false;
return 0; //如果未得到时间则返回0
}
// 向给定地址的时间服务器发送NTP请求
void sendNTPpacket(IPAddress& address)
{
memset(packetBuffer, 0, NTP_PACKET_SIZE);
packetBuffer[0] = 0b11100011; // LI, Version, Mode
packetBuffer[1] = 0; // Stratum, or type of clock
packetBuffer[2] = 6; // Polling Interval
packetBuffer[3] = 0xEC; // Peer Clock Precision
// 8 bytes of zero for Root Delay & Root Dispersion
packetBuffer[12] = 49;
packetBuffer[13] = 0x4E;
packetBuffer[14] = 49;
packetBuffer[15] = 52;
Udp.beginPacket(address, 123); //NTP需要使用的UDP端口号为123
Udp.write(packetBuffer, NTP_PACKET_SIZE);
Udp.endPacket();
}
|